Custom Blazer Manufacturing: A Development Guide for Apparel Brands
A blazer may look simple on a rack, but it is one of the most construction-sensitive pieces in an apparel range. Fabric, internal support, shoulder shape, sleeve pitch, lining, and pressing all influence whether the finished garment feels intentional or merely assembled. For a brand planning custom blazer manufacturing, the strongest result comes from turning creative direction into a clear, reviewable development brief before bulk production begins.
This guide explains the decisions that help apparel buyers develop a tailored blazer with fewer preventable surprises. It is written for emerging and established brands working with a clothing manufacturer on private-label or fully custom styles.
Start with the blazer’s job in the collection
Before selecting a fabric or drawing a lapel, define the role of the blazer. Is it a relaxed layer for everyday wear, a structured occasion piece, a uniform component, or part of a coordinated suit? The answer affects the target weight, ease, durability expectations, pocket treatment, closure, and level of internal construction.
Write down the intended customer, season, styling use, and the garments the blazer will be paired with. A cropped, unlined casual blazer and a lined tailored jacket may share a silhouette reference, yet they require very different material and construction decisions. Keeping the product role visible in the brief gives every later decision a useful context.
Choose fabric with structure and wear in mind
Fabric is not a surface choice alone. Its weight, density, stretch, recovery, drape, and finishing influence the shoulder line, lapel roll, pocket appearance, seam behavior, and comfort. A soft material may support an easy, fluid silhouette, while a more stable suiting fabric can help hold a sharper shape. Neither is automatically better; the fabric needs to match the desired garment behavior.
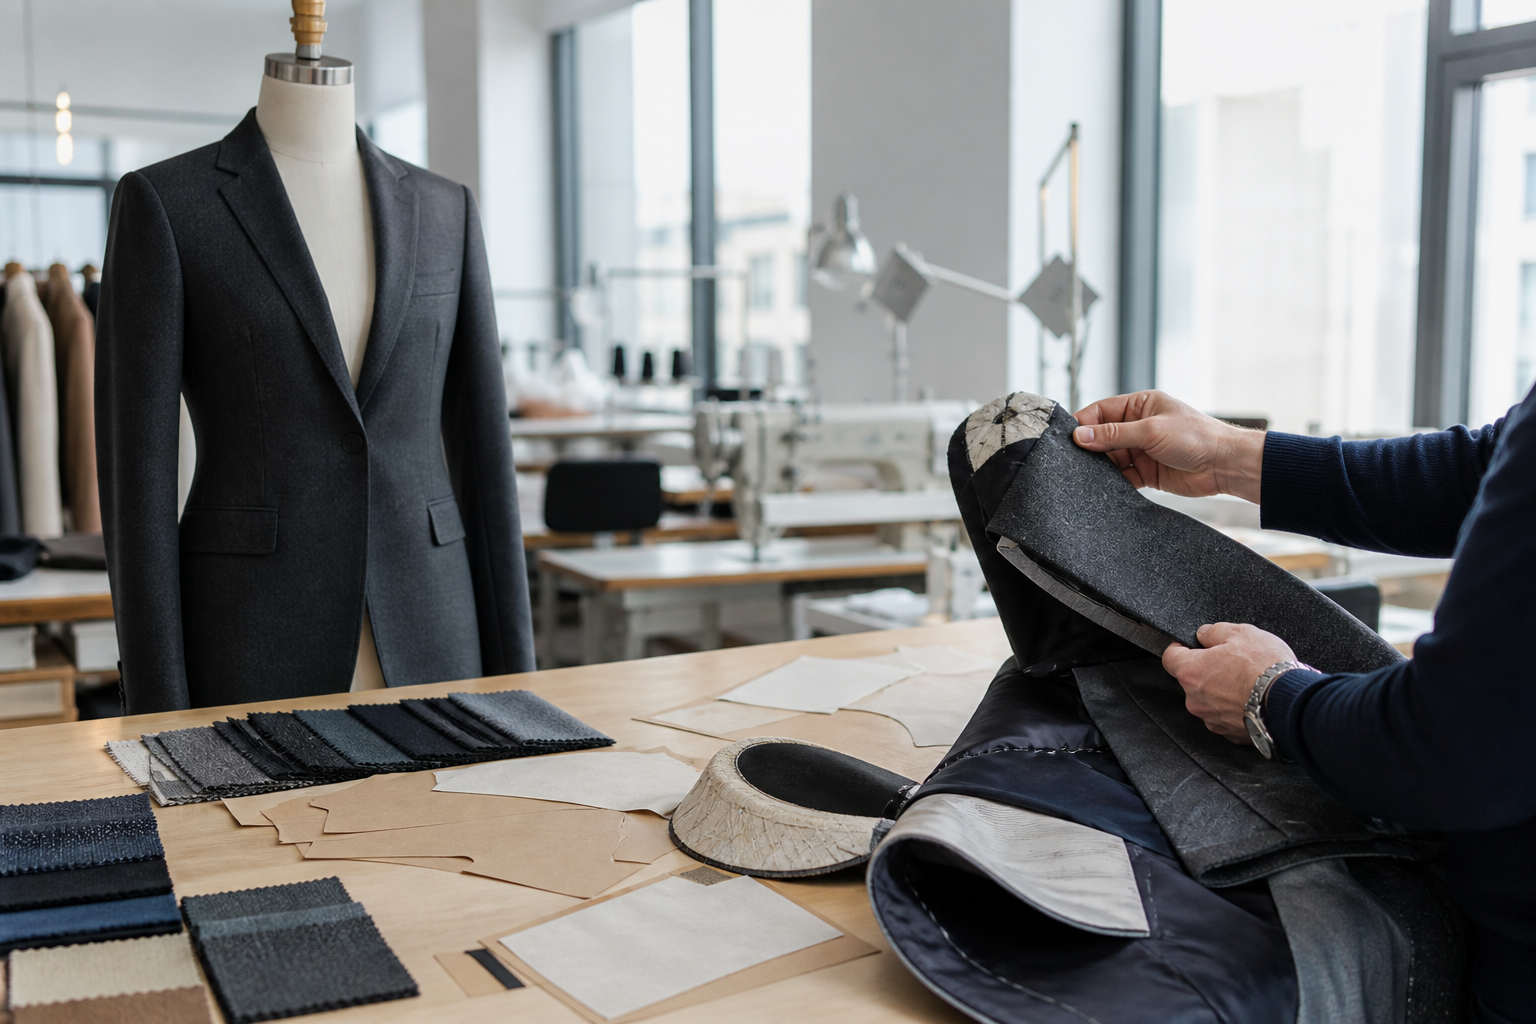
When reviewing options, ask for the information needed to make a practical comparison: fiber content, weight, width, construction, finish, and any available care or performance guidance. Small swatches are useful for color and hand feel, but a larger cut is more revealing for drape, pressing, seam impressions, and how the fabric interacts with internal support. For a deeper material-selection framework, see fabric selection for private-label clothing.
Plan supporting materials early
Interlining, canvas or fusing, shoulder pads, sleeve heads, pocketing, lining, buttons, and thread all contribute to the finished blazer. These are not minor afterthoughts. A change in fusing can alter the front panel’s firmness; a different lining can affect slip and comfort; a button selection can change the perceived level of the garment.
List each component in a bill of materials with its color, placement, quality reference, and approval status. A structured apparel bill of materials makes it easier to keep the sample and production versions aligned, especially when one fabric colorway uses a different lining or trim.
Translate the desired silhouette into measurable fit
Blazer fit is evaluated in motion as well as at rest. Consider the garment through the neck and shoulder, chest and waist, armhole and sleeve, body length, balance, and hem. Descriptions such as “oversized,” “boxy,” or “tailored” are useful starting points, but they are not production instructions by themselves.
A useful fit brief includes a base size, target body or garment measurements, front and back reference views, intended layering level, and notes on proportions. Clarify which dimensions must remain controlled across sizes and which can be reviewed visually. The garment measurement spec sheet guide can help turn these points into a working measurement table.
Pay attention to shoulders and sleeves
The shoulder is one of the first areas people notice on a blazer. Its width, pad profile, sleeve-head support, and sleeve pitch affect appearance and range of movement. During a fitting, check the shoulder edge, armhole comfort, drag lines around the bicep, and how the sleeve hangs when the wearer’s arms are relaxed. Review the garment on the intended fitting body and in the styling context it was designed for.
Sleeve length and vent treatment should also be specified rather than assumed. If functional buttonholes, sleeve vents, or decorative buttons are part of the design, identify them clearly in the tech pack so the construction sequence can be planned appropriately.
Specify construction details that protect the design intent
Tailored garments benefit from a precise construction brief. Define the lapel shape and width, break point, front closure, pocket type, back vent or vents, lining coverage, seam finishing, hem allowance, and any topstitching. Where appearance depends on an exact proportion, include a close reference image or drawing alongside a dimension.
A patch pocket, welt pocket, and flap pocket create different visual and functional outcomes. The same is true for a single-breasted or double-breasted front, a center vent or side vents, and a fully lined or partially lined interior. A manufacturer can advise on methods, but the brand should establish the intended result and approve changes before they become part of the production specification.
Construction notes work best when they are organized in a production-facing tech pack. This apparel tech pack guide outlines the information that lets a development team understand a style without filling gaps from guesswork.
Use sampling to answer the right questions
A sample is a decision tool, not just a pre-production photo opportunity. Each stage should have a clear purpose. An early development sample can test silhouette, balance, and construction direction. A later fit sample can focus on measurements and movement. A pre-production sample should confirm the approved materials, workmanship, colorways, and presentation before bulk work begins.
When reviewing a blazer sample, inspect it under natural and indoor light, on a form and on the intended fitting body. Look at lapel symmetry, collar-to-neck relationship, front balance, pocket placement, lining neatness, sleeve setting, button security, pressing, and seam appearance. Compare every finding with the current specification rather than relying only on memory or an inspiration image.
Give actionable fit comments
Useful feedback names the location, the observation, the requested outcome, and the source of reference. For instance: “At the front waist, reduce the excess ease visible when buttoned; retain the current shoulder width.” This is clearer than asking for a general improvement. Keep comments in one dated document, mark updated measurements, and confirm which version of each file is authoritative. The process in giving fit-sample feedback to a clothing manufacturer is a helpful companion for this review stage.
Plan size range and colorways without losing control
Adding sizes, colors, or fabric options increases the details that must remain aligned. Establish the base size and grading approach before approving the full range. Consider whether every colorway uses the same fabric behavior, lining, buttons, and internal support. If a light color needs a different lining treatment or a material reacts differently to pressing, document that variation rather than assuming it will be handled informally.
For each approved variant, keep a concise record of material codes, trim selections, artwork or branding placements if any, and the final measurement chart. This helps production teams distinguish intentional variation from an inconsistency.
Prepare a production-ready approval package
Before bulk production, gather the documents and approvals that define the finished blazer: the final tech pack, graded measurement specification, bill of materials, approved fabric and trim references, colorway information, sample comments, and any packaging or labeling instructions. The goal is not paperwork for its own sake. It is a shared source of truth for the style.
A final review against a practical pre-production approval checklist can surface open questions while there is still time to resolve them. Confirm what has been approved, what is pending, and who is responsible for a decision. This discipline is especially valuable for tailored products, where small construction changes can visibly affect the result.
FAQ: Custom Blazer Manufacturing
What should a custom blazer tech pack include?
Include flat sketches, a measurement chart, construction notes, fabric and trim details, colorways, labeling or packaging requirements, and clearly marked reference images. Add specific notes for lapels, pockets, vents, lining, shoulder construction, and buttons when they are important to the design.
How many blazer samples should a brand review?
The number depends on how new or complex the style is and how much changes after each review. Plan each sample around a purpose—such as silhouette, fit, or final production confirmation—instead of treating all samples as interchangeable.
Can the same blazer design use different fabrics?
It can, but different fabrics can change drape, structure, fit, and how the lapel or pockets behave. Review each material option with enough fabric to assess its construction response, and record any needed changes to lining, fusing, or measurements.
Build a blazer brief your manufacturer can execute
Strong custom blazer manufacturing starts with a clear brief and a disciplined approval process. Define the garment’s role, choose materials that support the intended shape, make fit measurable, document construction, and use sampling to resolve questions before bulk production. These steps give your team a more reliable route from a design concept to an approval-ready tailored garment.
When you are ready to discuss a custom blazer or a broader apparel collection, contact Huilin Fashion with your design references, target market, size range, and development priorities.