Custom Vest Manufacturing: A Development Guide for Apparel Brands
A vest can look like a simple layer, but it asks a brand to make connected product decisions before bulk production begins. Whether you are developing a lightweight utility vest, padded gilet, tailored waistcoat, fleece layer, or fashion-forward quilted style, the garment must work over the pieces your customer will wear beneath it. Its fabric, fill, lining, armhole shape, closures, pockets, and hem all affect how it feels and performs.
For a growing apparel brand, custom vest manufacturing is most reliable when the design brief turns that intent into clear production information. This guide explains what to define, what to review in sampling, and what to approve before placing a bulk order.
Begin with the vest’s job in the collection
Start with the customer, season, and layering role rather than a reference image alone. A vest worn as the outermost layer on a cool commute needs different materials and pocket access from a fitted waistcoat designed for occasionwear. A branded team vest may prioritize movement and repeat wear, while a quilted fashion vest may prioritize silhouette and surface effect.
Write a short product brief that answers these questions:
- What is the intended use: light warmth, utility, tailoring, uniform layering, or fashion styling?
- What garments should fit comfortably underneath: a tee, shirt, sweatshirt, knit, or jacket?
- Is the piece meant to be unisex, women’s, men’s, or based on another fit block?
- Which features are essential: insulation, lining, pockets, a hood, adjustable tabs, branding, or a reversible construction?
- What should the wearer experience: structure, softness, warmth, easy movement, or a close tailored fit?
A precise role keeps the development conversation practical. It also helps a manufacturer flag design combinations that may compete with each other, such as a long fitted vest paired with very bulky insulation, or a delicate facing paired with a heavy zipper.
Choose materials for the intended layer
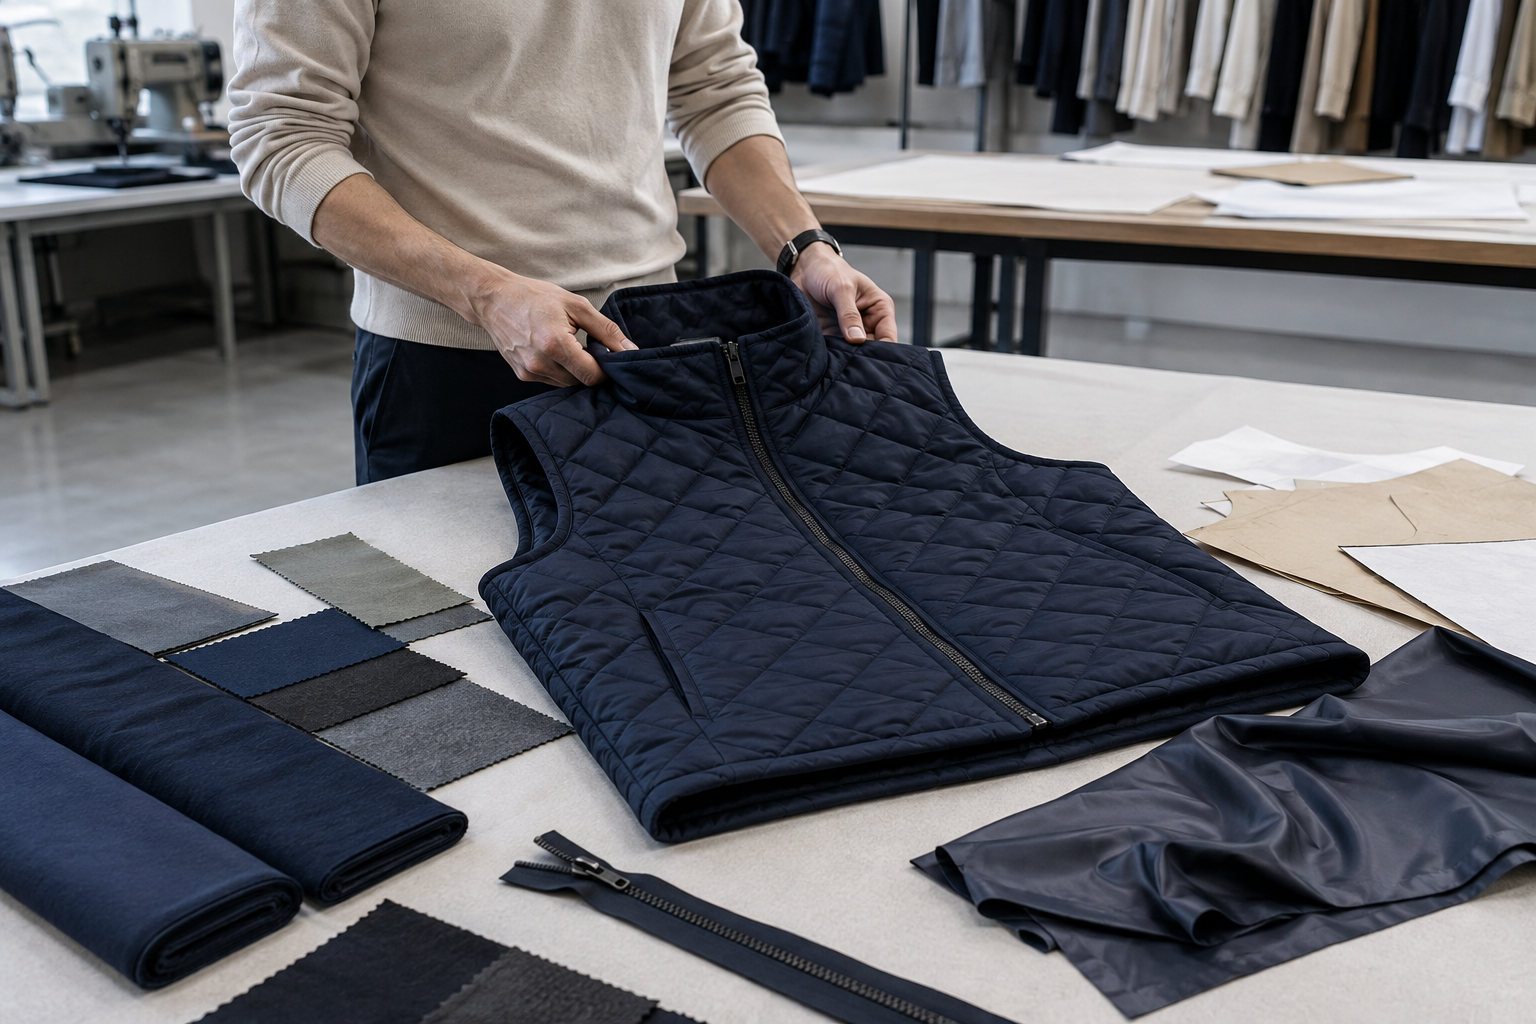
Fabric selection changes more than appearance. Shell weight affects how a vest hangs; stretch affects movement around the upper back; surface texture affects seam definition; and the relationship between shell, lining, and any fill influences the final volume. For tailored or clean utility designs, stable woven fabrics can support sharper edges and pocket openings. For soft casual layers, fleece, jersey-backed fabrics, or brushed materials may create a more relaxed result.
If the vest includes insulation, specify the desired look and function rather than assuming all fill behaves alike. Consider the target loft, how the filling should stay distributed, the quilting or channel layout, and whether the vest must remain flexible at the armhole and side seam. A sample is the point to judge bulk and balance in person.
Use your fabric selection process to document fiber content, composition, color reference, weight or hand-feel target, finish, lining, and any performance expectations. When a fabric has direction, pile, coating, or a visible pattern, note how panels should be cut so the finished pieces remain consistent.
Match the lining and trim to the shell
The inside of a vest is highly visible at the front opening and armholes, so lining deserves the same attention as the shell. It should feel suitable against the garments it will layer over and should not pull the shell out of shape. Specify the zipper type, puller, snaps, buttons, cord, webbing, elastic, labels, and thread color in the development package. If trims are decorative, include a clear placement reference as well as the physical sample or approved alternative.
Define silhouette and layer-aware fit
Vest fit is about the relationship between torso room and armhole freedom. A sample can look correct on a dress form but bind across the chest when worn over a sweatshirt, or appear oversized when paired with a thin shirt. State the intended layering condition for each fit review so feedback is based on the same styling context.
Your measurement specification should identify the base size, grading direction, points of measure, tolerances, and how the garment should be worn during review. For many vests, useful points include chest width, sweep, center-back length, front length, shoulder width, armhole opening, collar height, pocket placement, and zipper length. If the style has side tabs, a drawcord, or elastic at the hem, record the relaxed and adjusted condition where it affects fit.
A clear garment measurement spec sheet prevents the team from relying on visual impressions alone. It also makes it easier to distinguish a pattern issue from a change in styling preference when comments return from a fit session.
Test movement, not only still poses
During a fitting, ask the wearer to sit, reach forward, raise both arms, and use any pockets. Look for lifting at the front hem, armhole gaping, a collar that presses into the neck, or a front opening that waves. For a padded vest, review whether the fill shifts or creates uneven volume. For a tailored vest, inspect balance at the shoulder and the relationship between front and back lengths. Capture observations with photos and concise comments linked to the relevant point of measure or pattern area.
Make construction choices visible in the tech pack
Two vests with the same outline can require very different manufacturing steps. A lined waistcoat may use facings and a clean turn of cloth; a quilted vest may need channel dimensions and controlled seam allowances; a work-inspired style may rely on reinforced pocket corners, binding, or bartacks. The factory should not have to infer these decisions from an image.
Include flat sketches for the front and back, close-ups of difficult areas, construction notes, a bill of materials, label positions, and measurement specs. Reference the intended seam finish for exposed interior areas, the pocket bag material, closure installation, topstitching, and any reinforcement. The more a construction detail changes the feel, durability, or appearance of the product, the more clearly it belongs in the pack.
Use a production-ready apparel tech pack as the shared source of truth. Keep it version-controlled: when a fit change alters pocket position or hem shape, update the sketch, measurement table, and notes together so an older instruction does not remain in circulation.
Plan samples in a useful sequence
Sampling is not just a final check. The first sample can confirm the pattern direction, scale of details, and feasibility of the material combination. A later fit or pre-production sample can confirm the approved corrections in the intended fabric, trims, and color. The exact sample path depends on the project, but every stage should answer a specific question before the next one starts.
Before reviewing a sample, prepare an approval checklist that covers:
- overall silhouette and intended layering allowance;
- shell, lining, fill, color, and trim matches;
- collar, armhole, hem, closure, and pocket construction;
- stitching quality, seam finish, reinforcement, and symmetry;
- measurements against the approved specification; and
- labels, packaging requirements, and artwork placement where applicable.
Give feedback in one consolidated document. Describe what changed, where it appears, and the expected correction. The fit sample feedback process is stronger when comments are unambiguous, prioritized, and attached to annotated photos or sketches instead of scattered across messages.
Approve the production version, not an approximation
Bulk production should follow a version that reflects what the brand actually approved. Confirm that all construction changes, measurements, materials, trim choices, artwork, labels, and packaging instructions have been included in the final documents. When the style uses an alternate material or trim because the original is unavailable, review the substituted component in context rather than approving from a swatch alone.
It is also useful to identify the appearance standards that matter most for the vest: matching pocket height, even quilting, smooth front edges, balanced collar shape, clean zipper installation, or consistent fill distribution. These product-specific checkpoints help the brand and manufacturer discuss quality in the same terms before the first bulk units are reviewed.
FAQ about custom vest manufacturing
What information should a brand send before requesting a vest sample?
Provide front and back flats, a reference image for the intended style, a measurement specification, fabric and trim direction, color references, label placement, artwork files if used, and notes on layering and fit. If a detail is important, show it in a close-up or write it down.
How can a brand prevent a vest from feeling too tight over layers?
State the garment intended underneath during development, fit the sample over that layer, and review chest, sweep, armhole, and shoulder measurements together. Do not make a size decision using only a lightweight top if the final customer is expected to wear knitwear or sweatshirts below it.
Should a padded vest be sampled in the final shell fabric?
Whenever practical, the final shell, lining, fill, and quilting construction should be reviewed together before bulk approval. Their interaction determines drape, volume, seam appearance, and comfort in a way that a substitute sample may not show.
Move from concept to a production-ready vest
Custom vest manufacturing becomes easier to manage when the collection role, materials, layering fit, construction, and sample feedback tell one consistent story. Give the development team a complete brief, review the vest in realistic wear conditions, and approve the production version only after the final details are documented.
If you are preparing a new vest style or a coordinated outerwear range, contact Huilin Fashion with your flats, reference images, measurement requirements, and material direction to begin a focused production conversation.